Polar Bear Friends - Slimline Christmas Card
Hello Everyone! Thank you so much for stopping by my blog! I hope you get some inspiration and pick up some new techniques.
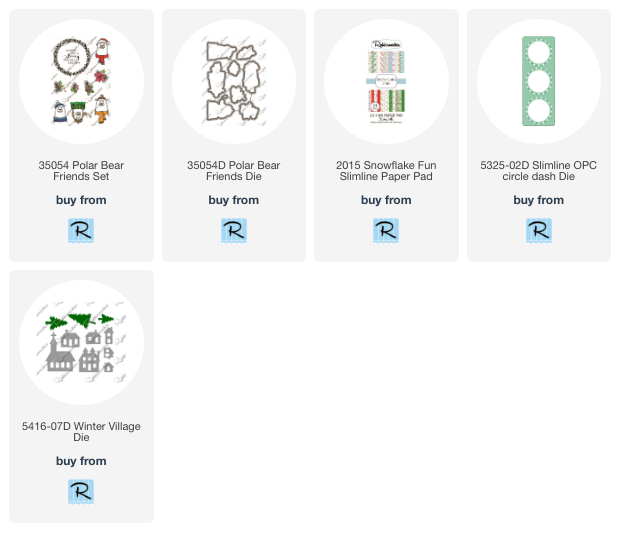
This month for the Rubbernecker blog the theme is Christmas in July. I'm using the New Release Polar Bear Friends Stamp and Die Set. It's never to early to start your Christmas Cards!!!
This card was a lot of fun to design and put together and I hope you have just as much fun. Below you will find detailed instructions.
Disclaimer: Some of my links are affiliated. I do this to recoup some costs for supplies so I can continue to create cards for you to make and enjoy.


The first thing I do is stamp out all of my images and color them. Here is the list of Copic Combinations I used.
Bears - T6 T4 T2 T0 - You can use your N's if you don't have the T's
Blue Green - R21 BG34 BG32 BG11
Yellow Green - BV13 G05 YG23 YG21 YG0000
Poinsettia - G46 R43 R35 - Berries - R89
Leaves - R37 G29 G46
Pine Cones - E47 E43
After they are all stamped use your dies to cut them out. I use Washi Tape to hold the dies in place.

At this point I cut out all of my die pieces. I save my scrap colored card stock in bags. Each bag has its own color that way I'm not using a whole piece of card stock when all I need is a tine piece.
I used a light grey to cut out my buildings from the Winter Village Die Set. Make sure to keep your window pieces as you will be using them on your card.

You will want your trees green so run your die through again with a small piece of green card stock.

Now you will need white circles to adhere your bears to so using your Slimline OPC Circle Dash Die cut it our with white card stock. Save the outline die cut as you can use it on another card.

Using two of your white circles you are going to start building your scenes to lay your bears on top of.
For the snow I used BG0000 and the sky C1. This doesn't have to be perfect because your bears will be stealing the show as they will be front and center. Just make sketchy lines to give the illusion of snow and clouds.
With your third circle you will stamp your sentiment.

I'm using the Snowflake Fun Slimline Paper Pack to die cut with. You can use whatever design you like best I decided to use the stripes.

Now let's cut our mats for our card. The red mat is 3 1/4 x 8 1/4. Your green mat will be 3 3/8 x 8 3/8.
Adhere those two pieces together.

I popped up the patterned paper die cut with dimensional foam tape to give it some dimension. This also helps with the illusion of your white circles being further back in the background.

Now you will add your circles.

Using dimensional foam tape adhere it to the back of your bears and add them to your card.

Now add your holly and pine cone cut outs to the sides of the sentiment circle.
For your card base you will need a 8 1/2 x 11 piece of 110lb white card stock. You will cut the on the 8 1/2 inch side at 7 inches. Then you will score on the 7 inch side at 3 1/2 and this will give you your card base.
Now all you have to do is adhere your card front to your card base and your done!
Here are some links to the products I used to make this card.
I hope you make this card. It isn't hard when you break it down in steps. Below are links to my Social Media pages and links to Rubbernecker Stamps Facebook page and shop.
I'm on:
Facebook at Dawn G Designs
Instagram at DawnGDesigns
Pintrest at Dawn G Designs
Here is the Link to the Rubbernecker Stamps Fan Group page on Facebook.
Here is the link to the Rubbernecker Stamps Store.
Thank you so much for stopping by! I hope to catch you on my next post!
Crafty Hugs,Dawn


Comments
Post a Comment