Under the Sea #2 - Rubbernecker Stamps - You're the Only Fish in the Sea for Me - Slimlinecard
Hello Everyone! Thank you so much for stopping by my blog! I hope you get some inspiration and pick up some new techniques.
This month for the Rubbernecker blog the theme is Summer. So I decided to use the Under the Sea #2 Stamp and Die set.
This card was a lot of fun to design, color and put together and I hope you have just as much fun. Below you will find detailed instructions.


- I like to stamp out all of my images at one time.

- Then stamp out your extra images and sentiment.

- I'm sorry I forgot to take a picture of the colored images but here are the Copic combinations:
- Red - B34 R89 R56 R35 V95
- Yellow - BV31 Y38 Y15 Y02
- Blue - Y23 B28 B26 B04
- Orange - B32 R27 YR07 YR04
- Purple - Y38 V09 V17 V15 RV55
- After you have colored your images lay your dies over each one.
- I use Washi tape to hold them in place.
- So that they are not too sticky I put the tape on the back of my hand one time then I stick it to the dies and paper.
- Cut a piece of white card stock at 4x9
- Lay your Wavy Die on top and take your pencil and lightly draw a line under the last wave of the die.

- This is what your line should look like.
- This will give you a guide of where to stop with your blue when inking through your stencil

- Use your blending brush and bush on Sonata Color Fuse ink.
- Be light handed you can always go over it several times to get the depth of color you want.

- Now it time to add your second color.
- Using Sierra blend on some of this darker color lightly.
- You don't want to add to much color as it will overtake the light blue. You just want a little more depth to your water.

- Now it's time to do the bottom of your sea with the sand.
- You don't need a stencil for this just blend the Mocha onto the bottom until you get the color you want.

- Now add your darker color. I used Caramel Color Fuse. Don't add too much as you still want to see the light brown.

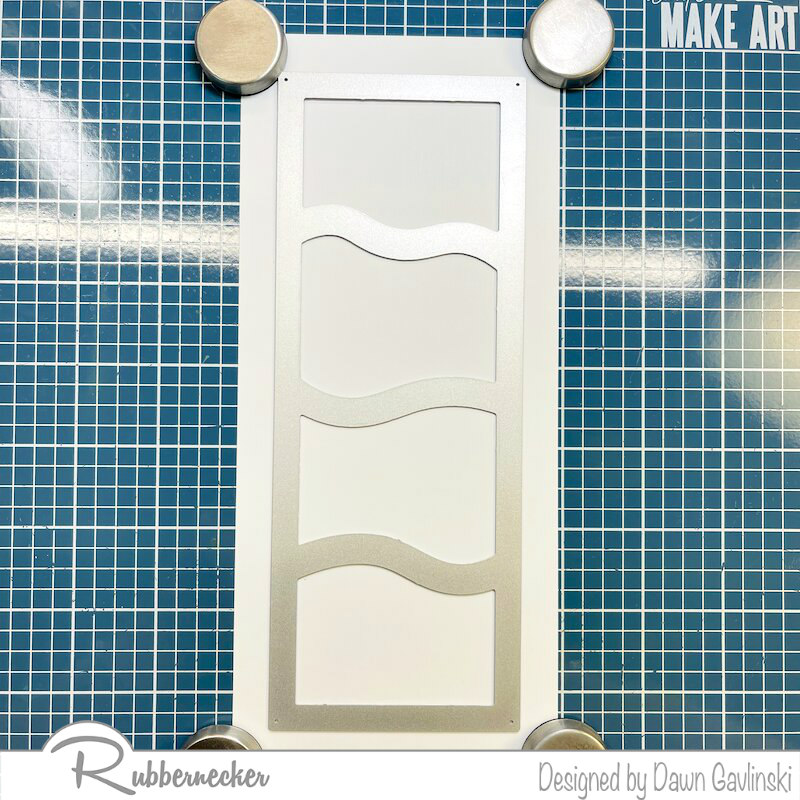
- Take your Wavy die and lay it on your inked card stock.
- Make sure you leave room for your sand to show.
- Use your Washi tape to hold the die in place.

- This is what it will look like when your are done running it through your die cut machine.

- Play with the placements of your images to see where you want to place them for the final card.
- I always take a picture so I remember where I had them.
- I also popped up the images with pop dots. This gives the card more dimension and interest.

- Then cut out a mat with colored card stock at 3 1/8 x 8 1/8.
- Glue your Wavy die cut centered on the colored card stock.
- Now glue all of your elements onto your matted base.

- To make your card base you will cut, with 110 lb card stock, on the 8 1/2 side 7 inches.
- Then you will score on the 7 inch side 3 1/2.
- This will give you your card base.
- Glue your color card stock mat with your images onto the card base and your card is done!
- Make sure you are glueing it on the correct side I can't tell you how many time I glued it on so that it opened incorrectly!


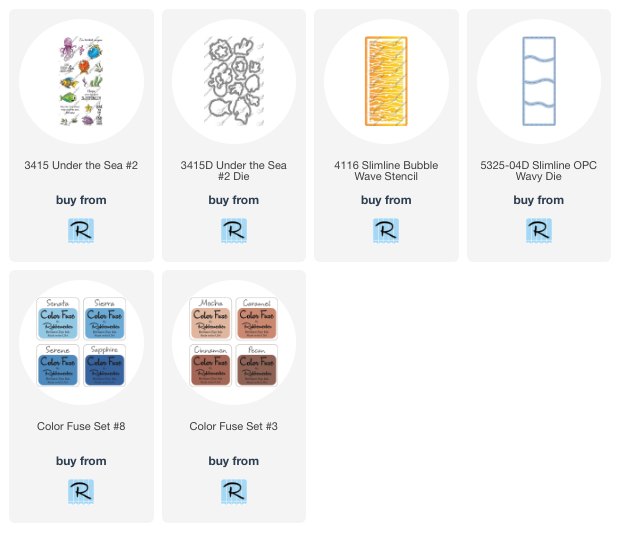
Here is the product list of the Stamps, Dies and Accessories I used to make this card.


110LB Card Stock Neena Solar White
I order all of my Copic's and Refills from
Violeta Ink donates a portion of every purchase to Crafts for Paws.
Cardstock ~
Image Paper ~ Copic X-Press It Coloring Card
I'm on:
Facebook at Dawn G Designs
Instagram at DawnGDesigns
Pintrest at Dawn G Designs
Here is the Link to the Rubbernecker Stamps Fan Group page on Facebook.
Here is the link to the Rubbernecker Stamps Store.
Thank you so much for stopping by! I hope to catch you on my next post!
Dawn


Comments
Post a Comment